Tuesday 30 December 2014

Spiral Pendant Tutorial

Spiral Pendant Tutorial


The spiral pendant tutorial is one of my favorite designs.  It is very simple to make but the results can be stunning!  The great thing about this tutorial is that it demonstrates a different wire wrapping technique to give the impression that your beads are bezel set. 

This tutorial is to make a fairly simply designed pendant but one you have the basic technique down you can experiment with your designs. The design can also be easily adapted to make earrings - why not make a matching set?!


To make this particular design you will need:
  1. 7 inches (17 cm) of 20 gauge wire;
  2. 60 inches (150 cm) of 26 gauge wire;
  3. 16 x 2mm round beads; and 
  4. a necklace chain. 
The link to the video is below.  Happy beading!


Inexpensive Ways to Brand and Display Jewelry


Displaying Jewelry for Sale 


Whether you are selling jewelry online or in person, its a great idea to think of yourself as a brand. The way you package your jewelry and display it is incredibly important to making sales. If you don't put effort into presently your jewelry professionally, people may assume that you also don't put effort into making your jewelry!


If you at not nifty with a computer (I'm certainly not!) there are a number of sites that will help you develop a logo.

I have found however that one of the most inexpensive and versatile tools in branding my jewelry has been a custom order stamp that I ordered online.  I use the same stamp on my display cards as I do with my packaging.

You can make your own inexpensive display cards using cardboard paper.  I like to create stand up cards by bending the paper in half.  This works particularly well for selling jewelry at craft fairs.  You can add some height to your jewelry display by laying some cards flat and some standing upright. Using cards that allow the jewelry to stand up adds some movement to the piece and helps people to see what it would look like when worn.


Making your own display cards also means that you can make cards to fit the shape of a particular design.  If you have a particularly large piece of jewelry, you can make sure it is displayed properly. 

To make earring cards, I bend a rectangular piece of card in half and use a pin to make small holes to fit the earring hooks through. To make a necklace display, I use a rectangular piece of card and make a couple of slits in the top which hold the necklace chain in place. 


When it comes to packing your jewelry, I like to use the stamp to create matching packaging.  Even something as simple as a brown paper bag works well!


Saturday 23 August 2014

Ring with a Twist Video Tutorial


Ready for another ring tutorial?!  This ring is simple to make and the design can be easily adapted to suit your own style. You can use whatever beads you want but smaller (4mm and 2mm) round beads work best.


Materials: 
6 inches (15 cm) of 20 gauge wire;
24 inches (50 cm) of 26 gauge wire;
3 x 4 mm beads; and
8 x 2mm beads.

Tools:
wire cutters;
round nose plier; and
a ring mandrel (optional but will make life a lot easier!)

Watch the video below to see the tutorial:


Monday 18 August 2014

Paper Beads Tutorial


I love experimenting with different mediums, especially paper! As I have said before, I LOVE traditional origami paper.  I love experimenting to see how I can work beautiful paper into my jewelry designs. Making papers beads is very simple.  They may sound like something you would have made as a child, but the results can be very elegant and totally unique. 


The style of bead you make will depend on how you cut your paper.  The first style I made was by cutting a square piece of paper into triangular strips.  For accuracy, I drew the triangles on the back of the paper. I then cut the paper into triangular strips. 


I then wrapped the paper, starting with the largest section of the paper, around a wooden skewer. It is best to wrap the paper tightly around the skewer for this stage.


Once you get to the end, glue the inside of the last section of the paper and wrap it around the wrapped part of the paper.


Hold the glued section closed for about 30 seconds to allow it to set.


You can change the shape of your beads by changing the way that you cut the paper in the first step.  You can make rectangular strips of paper to make the beads I used to make the earrings above.  Experiment with different shapes of paper to find something totally unique!


Sunday 10 August 2014

Three Bead Ring


Making rings from wire can be a little daunting but can lead to beautiful results.

To make this three bead ring, you will need:


  1. 24 inches (50 cm) of 28 gauge wire;
  2. 6 inches (15 cm) of 20 gauge wire; and 
  3. 3 x 4mm beads.
I used opaque glass Czech beads with gold plated wire.  

Happy ring making!! 


Saturday 2 August 2014

Origami Leaf Earrings


I love origami paper - particularly the traditional Japanese designs.  I recently bought a bunch of beautiful paper online and I have been incorporating it into my jewelry designs.

These leaf earrings are very easy to make and look beautiful.

You will need:

  1. once piece of square origami paper (the piece I used was about 5 inches x 5 inches (12cm x 12cm), and the earrings I made were quite large.  You therefore might want to try using a smaller piece of paper if you do not want your earrings to be so dramatic);
  2. 10cm (3.15 inches) of 24 gauge wire; 
  3. 2 earring hooks; and 
  4. a small amount of craft glue. 


The first step, is to cut your square paper in half diagonally.

Next, turn the paper face down.  Fold the largest section of the paper, about 2mm from the edge of the paper.


Continue folding the paper, turning it onto the other side every time you do, so that is is folded like an accordion. 


Fold the paper in half, bringing the largest sections of the paper together. 


The next step is to make a wire loop so that you can connect the paper to an earring hook.  You could use a jump ring to do this, but I prefer to make a wrapped loop so that the structure is stronger without the need for solder.  Take a 5cm length of wire, and bend the top of the wire around pliers to make a loop. 


Bend the longer length of wire around the pliers so that you make a second, larger loop. You want the loop to be large enough so that the folded paper can be threaded through it. 


 Wrap the wire twice around the 'stem' wire, towards the top of the smaller loop. Trim the excess wire.


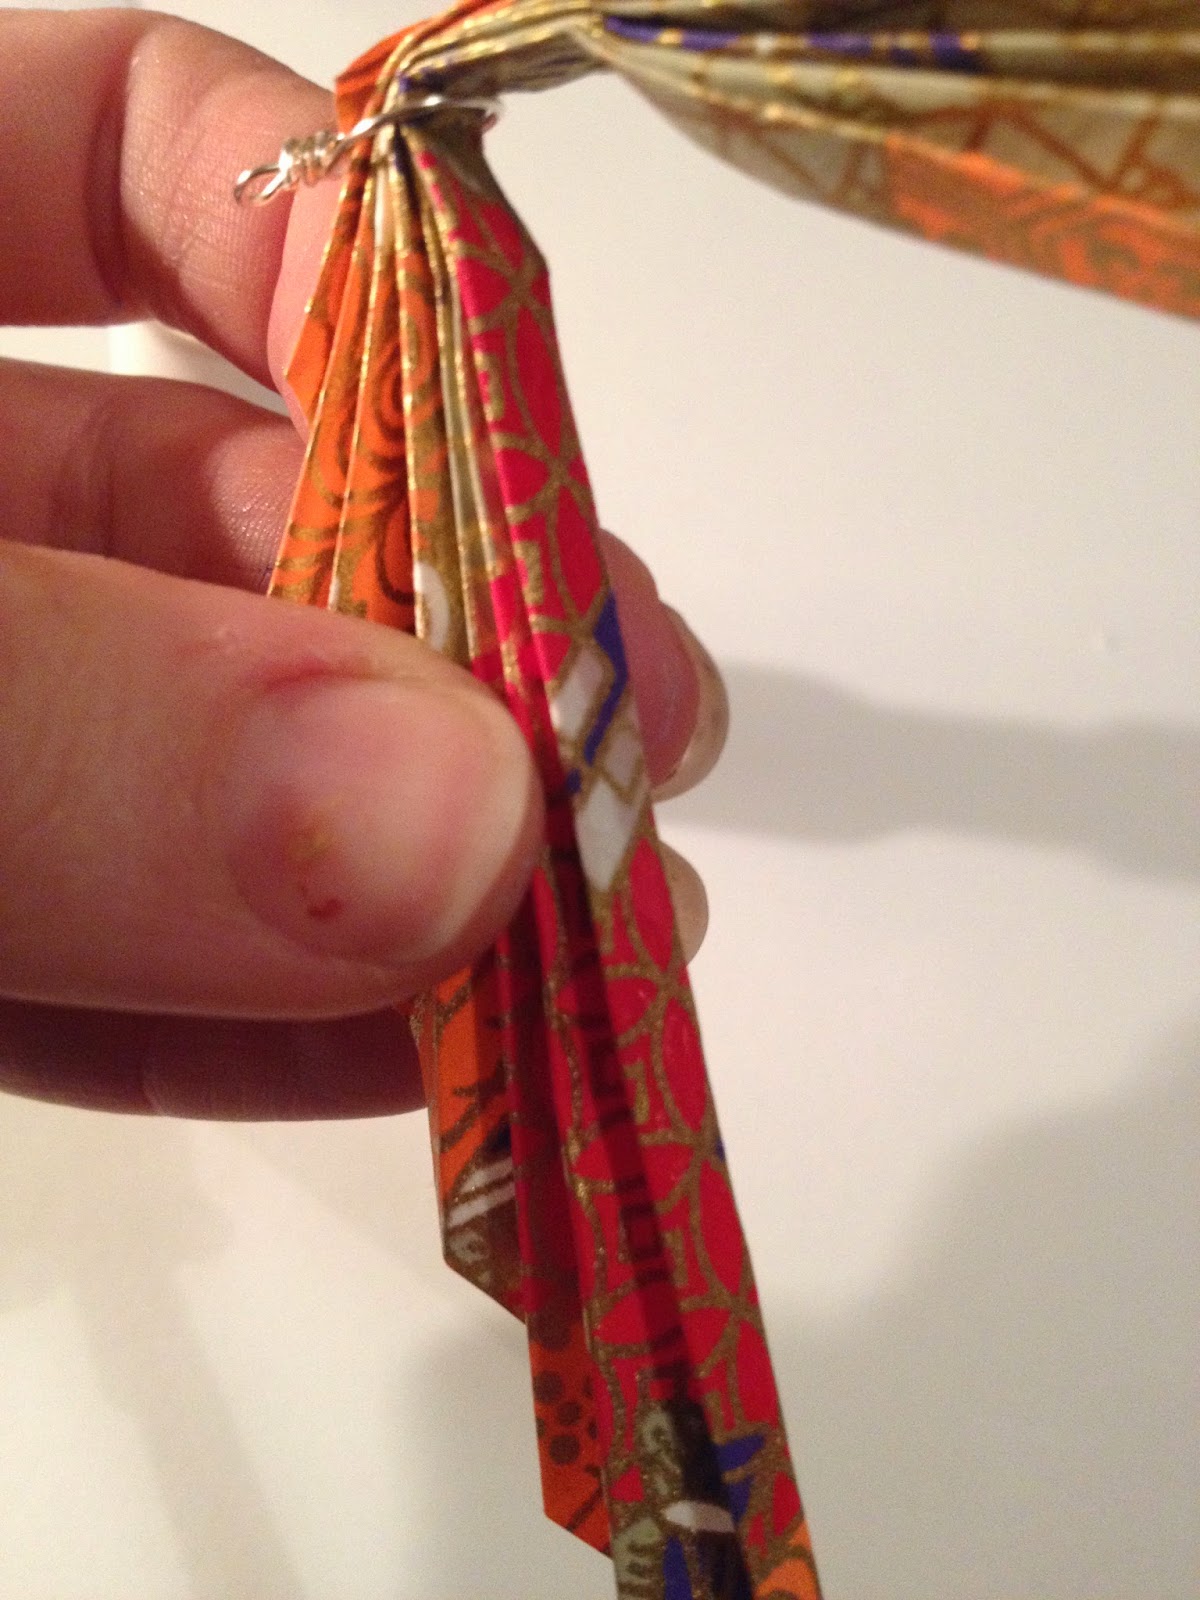
Thread the folder paper through the large loop. The loop should be held in the section where the paper was folded in half. 


Place glue along the edges of the inside of the folded paper.  Make sure not to glue the other folded sections together, otherwise the earrings will not fan out. 


Thread the top small loop onto an earring hook, and your earrings are complete!


You can cover the earrings with Mod Podge or an acrylic spray to make them more durable. 

How to make hair sticks


This is one of my favourite projects. I love hair sticks - I stick one in my bun or wrap my hair around the stick to cover up a bad hair day.

In my experience, hair sticks are very popular with consumers. They are really simple to make, and you can adapt them to suit your individual style.

They are incredibly simple to make.  All you need is:


  1. a pre-drilled hair stick (you can buy them online or you can buy a wooden chopstick and drill the centre)
  2. a couple of beads,
  3. a bead cap; and 
  4. a small amount of super glue. 
The video tutorial is below. I hope you love them as much as I do!