
Have you thought about using ribbon in your jewelry designs? Often you can create a dramatic impact. I have outlined two fairly simple projects below to get your creative juices flowing. I have used simple black ribbon in both these projects but I expect that using something a little different may lead to some beautiful and unique designs.
Ribbon Necklace
For this project I used:
- 14 6mm beads (I used glass pearls);
- 50cm of 24 gauge wire;
- 60cm of ribbon; and
- a necklace clasp (I used a lobster clasp).
The only tools needed are a pair of round nose pliers and wire cutters.
Step 1: The first step is to make a large wire wrapped loop. You will want it to be larger than usual so that the ribbon will fit in the loop at the end.
To make the loop, you first need to wrap the wire around the larger part of the pliers.

Then, you will need to wrap the longer part of the wire twice around the straight part, so that you create a closed loop.

Trim the shorter part of the wire, and your loop should look like this:

Step 2: the second step is to create a chain of connected beads. You could connect the beads by soldering jump rings between each. However, I did it by connecting each bead to the proceeding bead. This creates a strong chain without the need for soldering.
Place a bead on the length of wire. Place the pliers about 1cm away from the bead, and bend the wire towards the bead.

To close the link, wrap the wire twice around the shorter part of the wire, towards the bead. After you have wrapped the wire twice, trim the end of the wire.

To complete the chain, continue connecting the beads in the same way. Bend the wire and make a lop through the loop in the last beaded section. Place a bead on the wire, and close the loop. Complete the process until you have connected all but one of the beads.

When it comes time to attach the last bead, use the pliers to make a larger loop, the same size as the loop before the first bead. You want this loop to be larger so that the other end of the ribbon can fit through it.

Step three: The third step is to add the ribbon to the beaded chain by threading it through the larger loops on each side.
You can do this by simply knotting the end of the ribbon, and trimming any excess. If you do that you design will look like this:

Alternatively, you might you might want to create ribbons in the ends like this:

If you want the necklace to be adjustable, you can cut the ribbon so that you can tie a bow around your neck.

Ribbon Bracelet
This project is another example of using ribbon in your designs. This design using ribbon to create an 'accordion' look. I have made a bracelet but you could easily turn the design into a necklace.
For this design I used:
- 21 6mm beads (I used the same glass pearls);
- 20cm of 24 gauge wire; and
- a clasp.
The only tools I used were a pair of pliers and wire cutters.
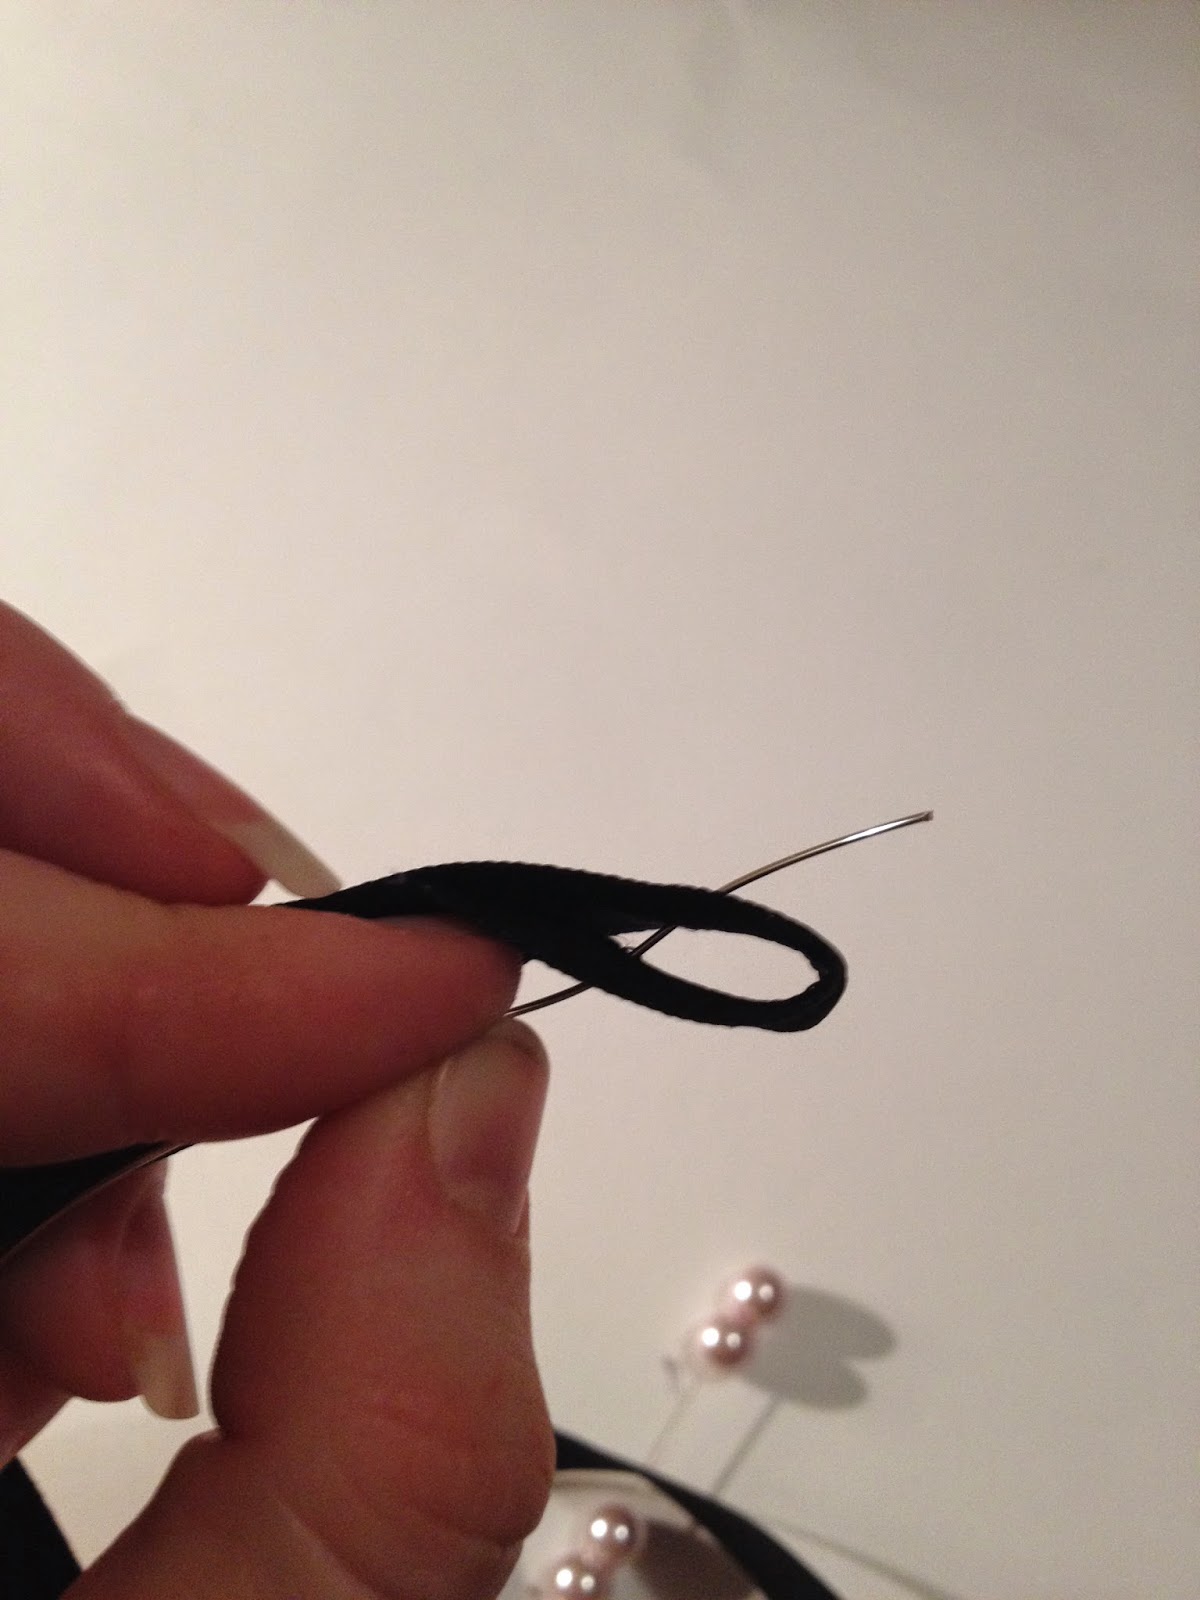
Step one: The first step to to make a look in your wire. Use the pliers to create a loop and bend the wire around the straight part of the wire. Trim the end of the wire. Use the wire to pierce the ribbon.


Bend the ribbon over and pierce the wire through it. You should have a small loop of ribbon sitting on top of the wire.
Thread a bead onto the wire.


Keep adding beads and threading the ribbon onto the wire in the same way until all the beads and the ribbon are threaded onto the wire.

When the last bead has been added, add a clasp before closing the loop.

You can see from my design that the ribbon tends to overpower the beads. If you want your beads to stand out more, make the loops in the ribbon smaller.

Do you use ribbon in your designs? If so, share your ideas by commenting below!
No comments:
Post a Comment